Adkins DTF Curing Maintenance Guidelines
Regular, preventative maintenance is essential to keep your DTF curer working efficiently and to avoid downtime or costly repairs. Lack of maintenance can cause component failures and result in smoke or excessive glycol spoiling transfers.
TABLE OF CONTENTS
1. Daily (6-8 hour) Maintenance
Heat Cycle
In order to avoid machine downtime, it is important to perform regular maintenance.
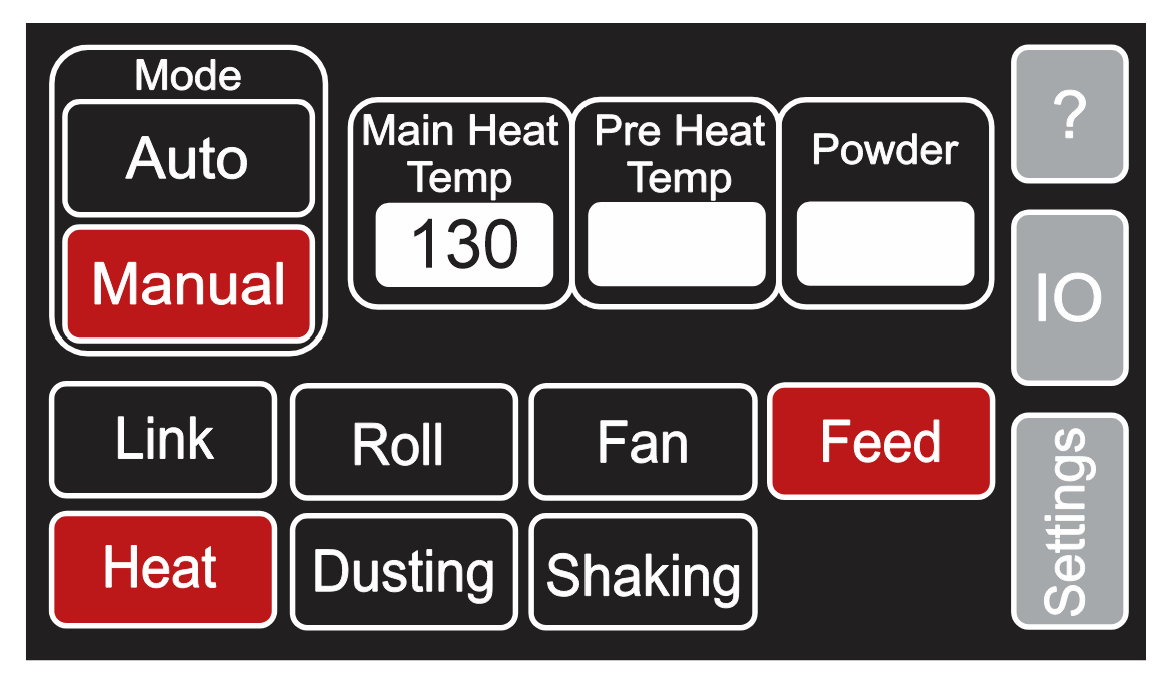
This involves turning the machine on and setting it to manual mode. Then in the settings menu, increased the 'Main Heat' to 130 by 7 degree increments. (110 to 117, 117 to 124, 124 to 130)
On the main menu, activate 'Heat' and 'Feed'. Once the machine has reached the set temperature, it should then be monitored for 15-30 minutes.
While running the Heat Cycle, the drain tube can be opened to allow oil
Once complete, you should re-enter the working settings and power off the machine.
If your model has the 'Pre-Shutdown' icon, you can select this and allow the timer to finish.
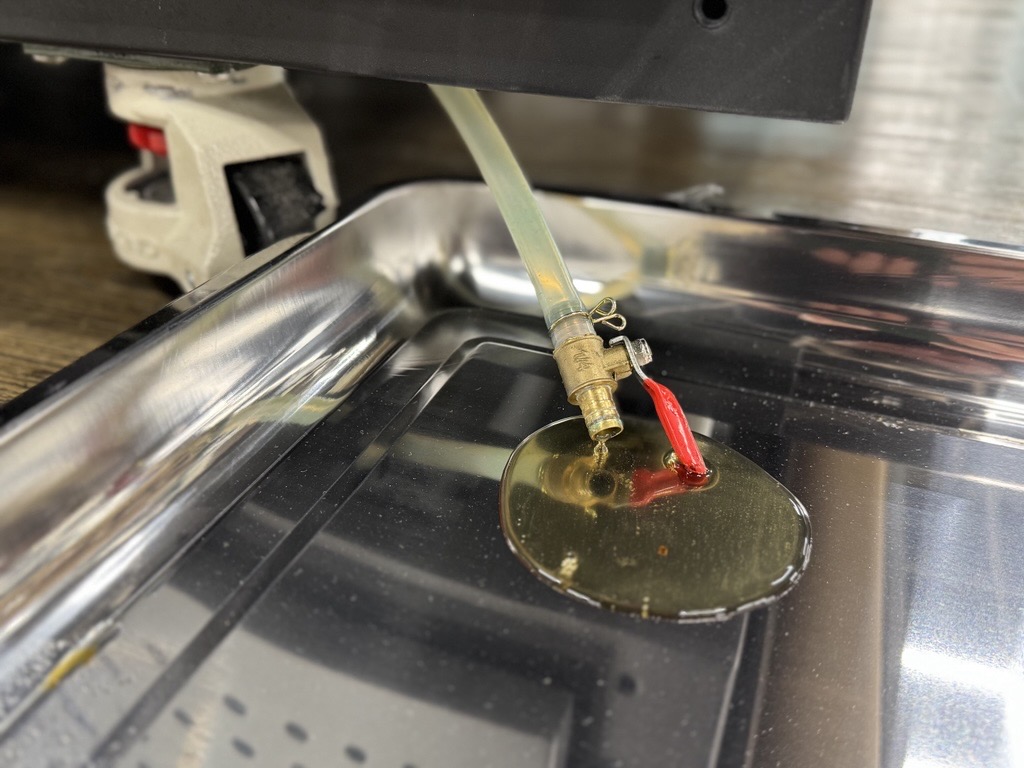
Emptying the drain tube
Locate the drain tube at the rear of the machine on the same side as the filters. Find a suitable container to drain waste oil into and aim the valve into it.
Turn the lever 90 degrees to open the valve and allow waste oil to drain out into the container.
Once finished, dispose of your waste oil as per your local environment advice.
2. Changing the filters
When to change your filters
Changing the filters on your DTF Inline regularly is essential to ensure efficient production and a safe working environment.
Your filters should be changed if any of the below conditions apply:
The filters have been used for a total of 400 hours (10-12 weeks based on 8 hours per day, 5 days per week)
There is excess smoke coming from the machine
The glycol byproduct being drained is a darker colour than normal
How to change your filters
You can find the location of your filters in your User Manual.
The filters should be removed one by one and the exposed areas should be wiped clean.
When re-fitting your filters, it is important to fit them in the correct orientation. 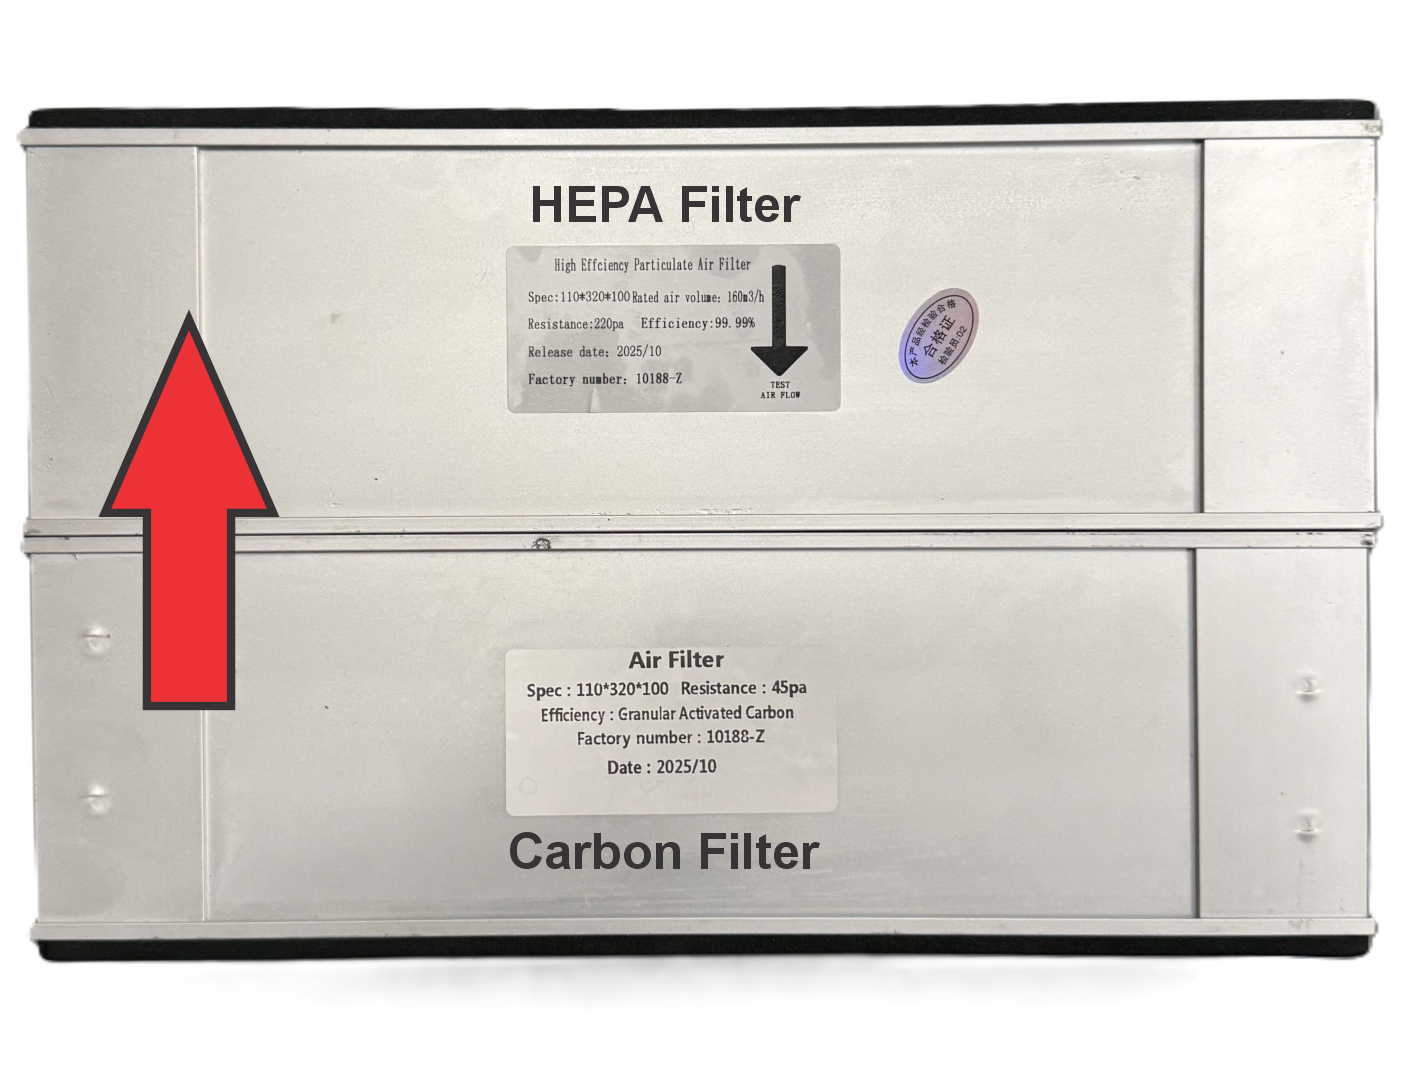
The foam gaskets should be on the outer edges of the filters as shown above.
When re-fitting the filters, they should be pushed all the way to the back of the area so that no vapour can escape behind the filters. This should also be checked on install as they can work loose in transit.
3. Weekly (40 hour) Maintenance
Cleaning inside the hood
Before manually cleaning any hood components, leave the oven to cool to a safe working temperature.
Apply some de-greasing spray to a clean cloth/paper towel. Wipe any visible surface around the elements inside the hood (shown in yellow), being delicate around the elements. Do not wipe or touch the elements.
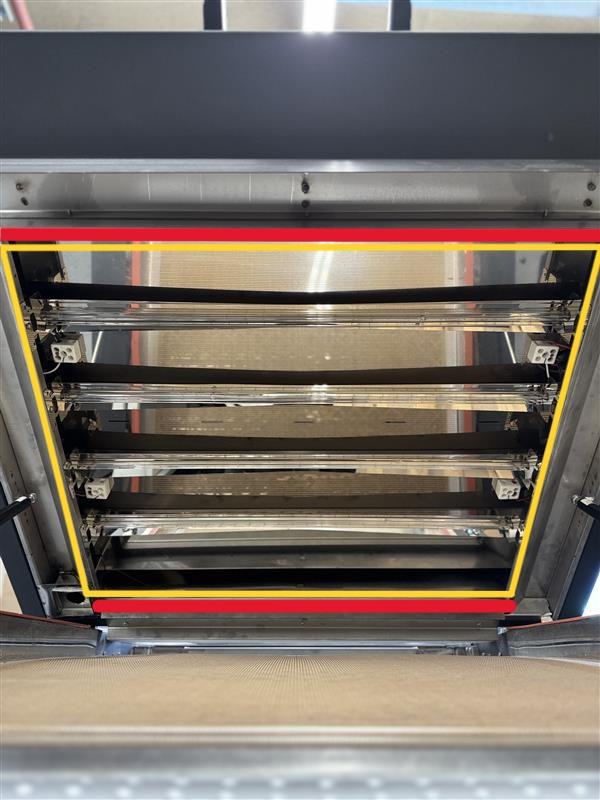
Pay close attention to the front and back lip (shown in red) as glycol can build up and it may not always be visible.
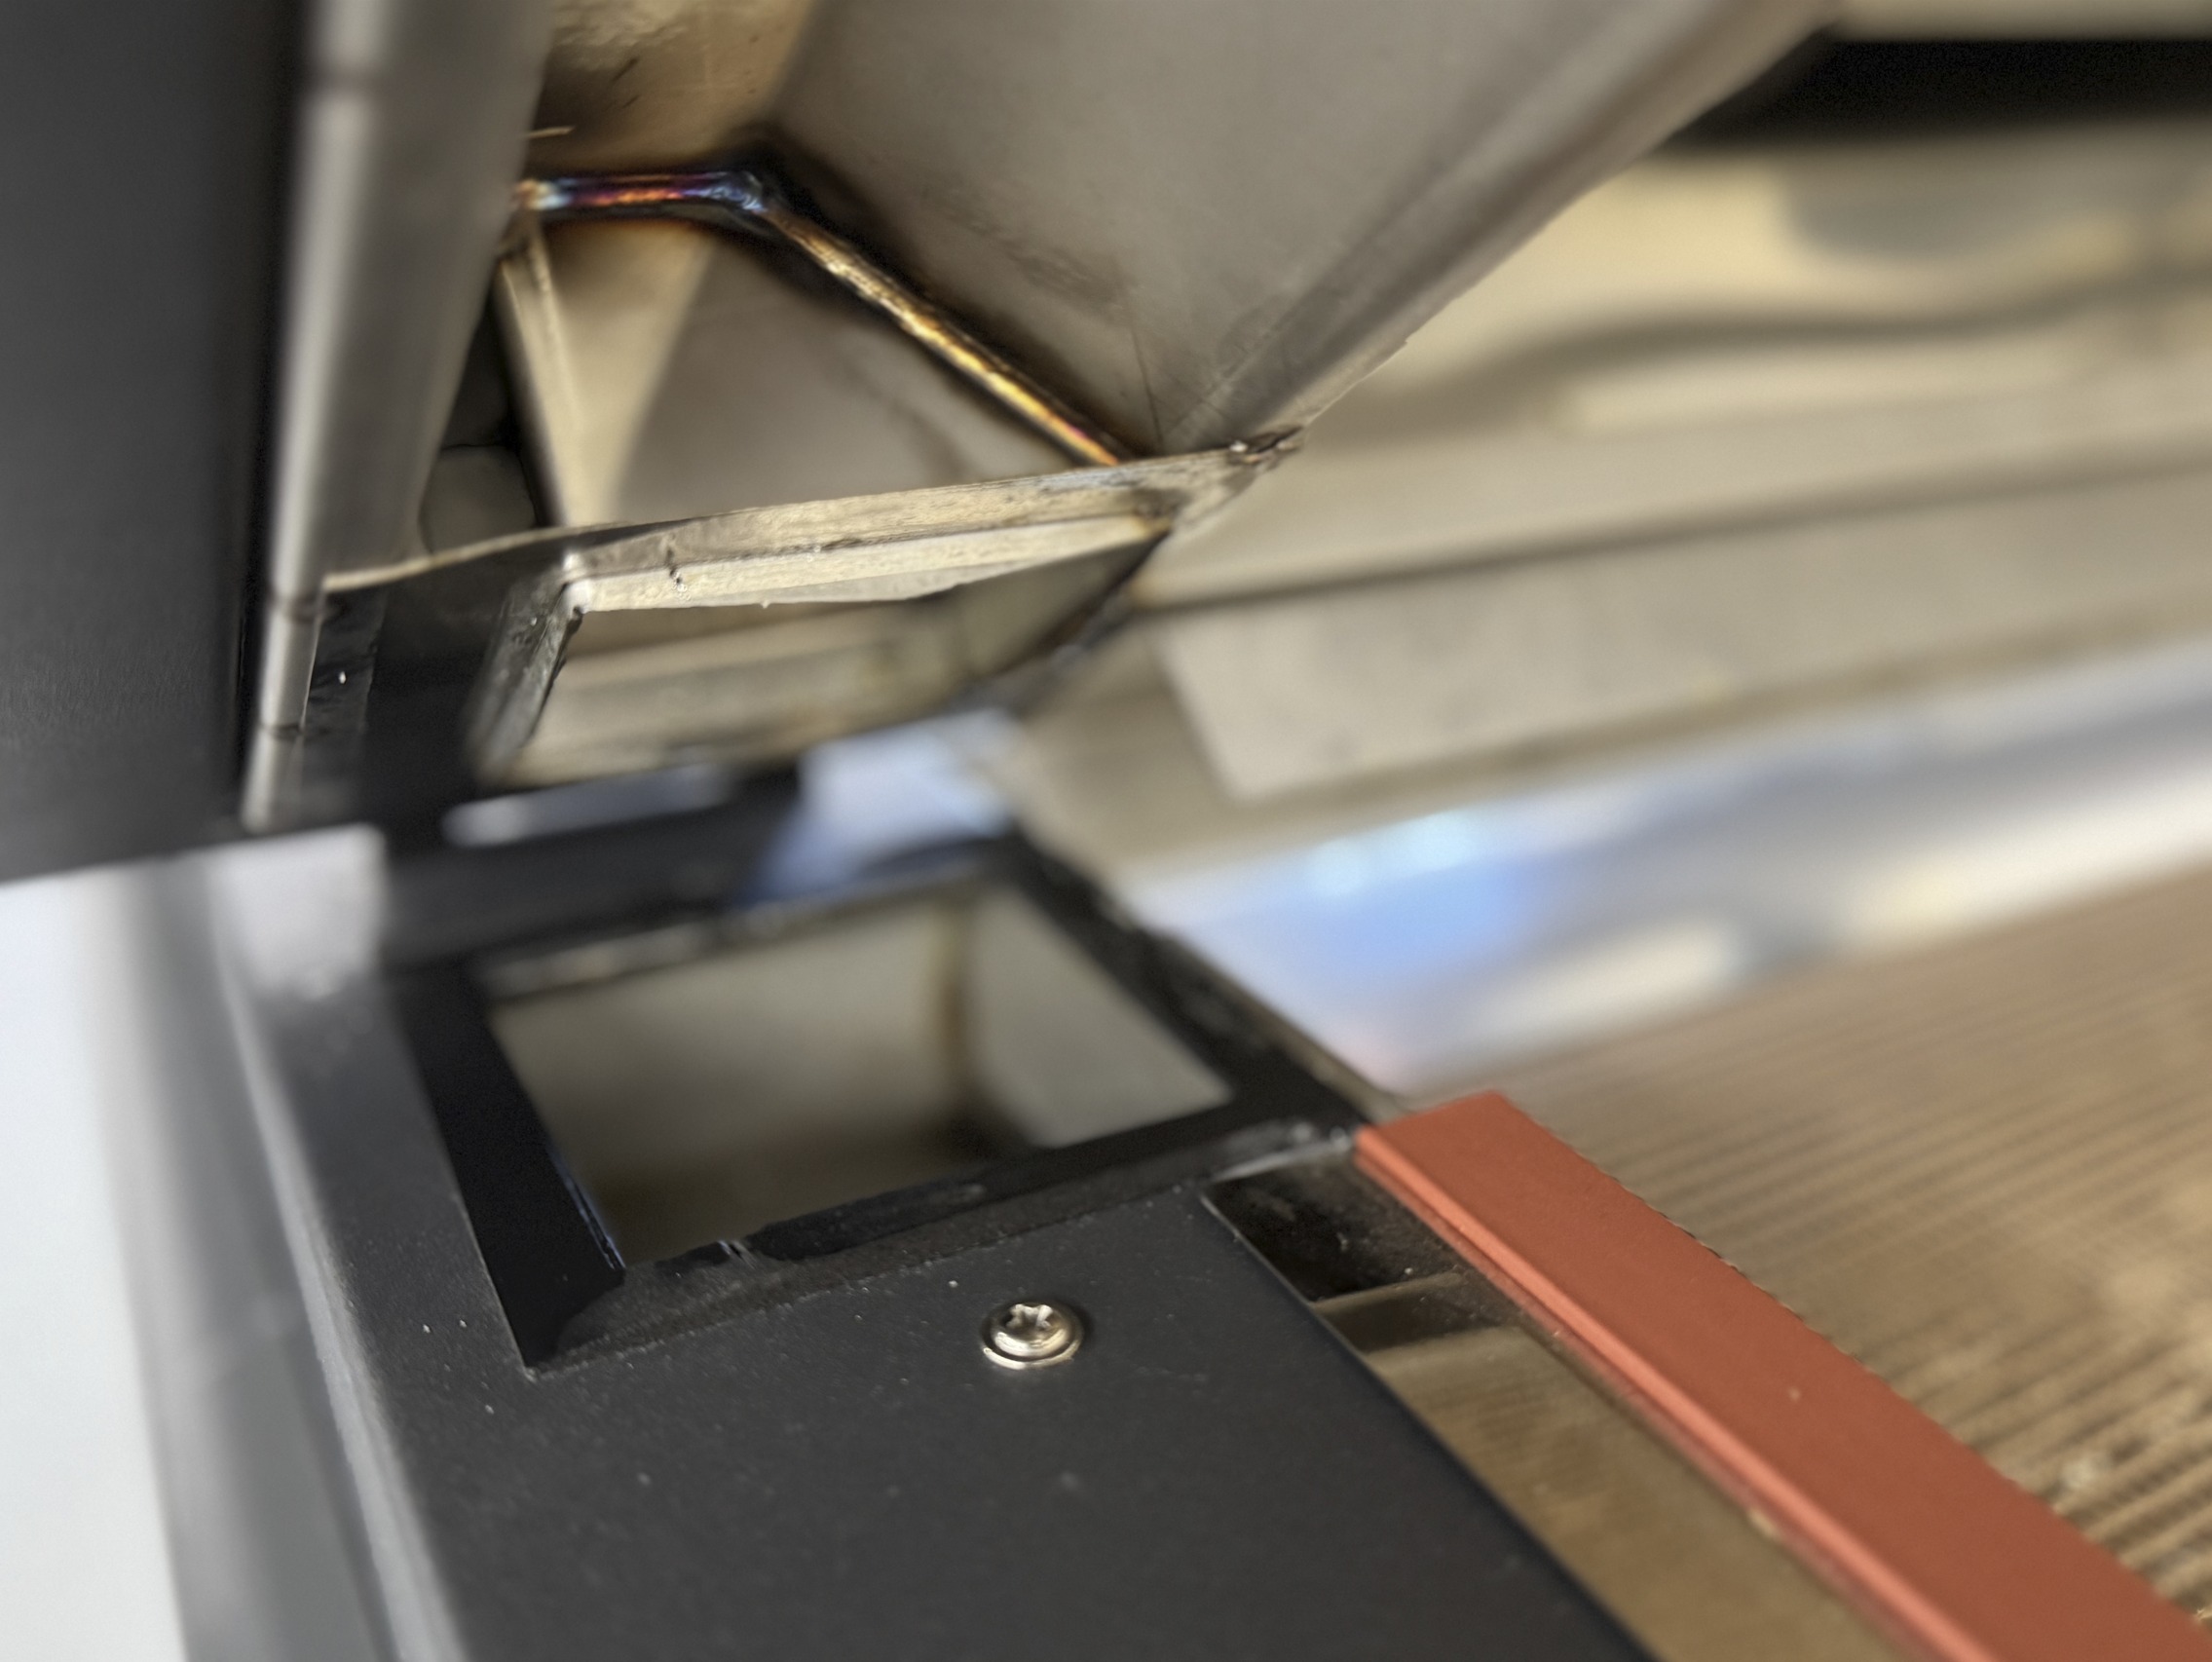
Locate the exhaust inlet and clean the upper and lower parts.
Compact 600/900 - Cleaning inside the extraction box
Glycol will build up in the area under the filters and in the extraction chamber. These areas should be cleaned regularly to prevent the glycol solidifying in these areas.
When cleaning inside the extraction box, wear appropriate PPE and avoid sharp edges.
To access the area under the filters, remove the screws indicated below. Then remove the filters and wipe the gaskets and sides clean.
Then clean the area under the filters as indicated with the red circle. 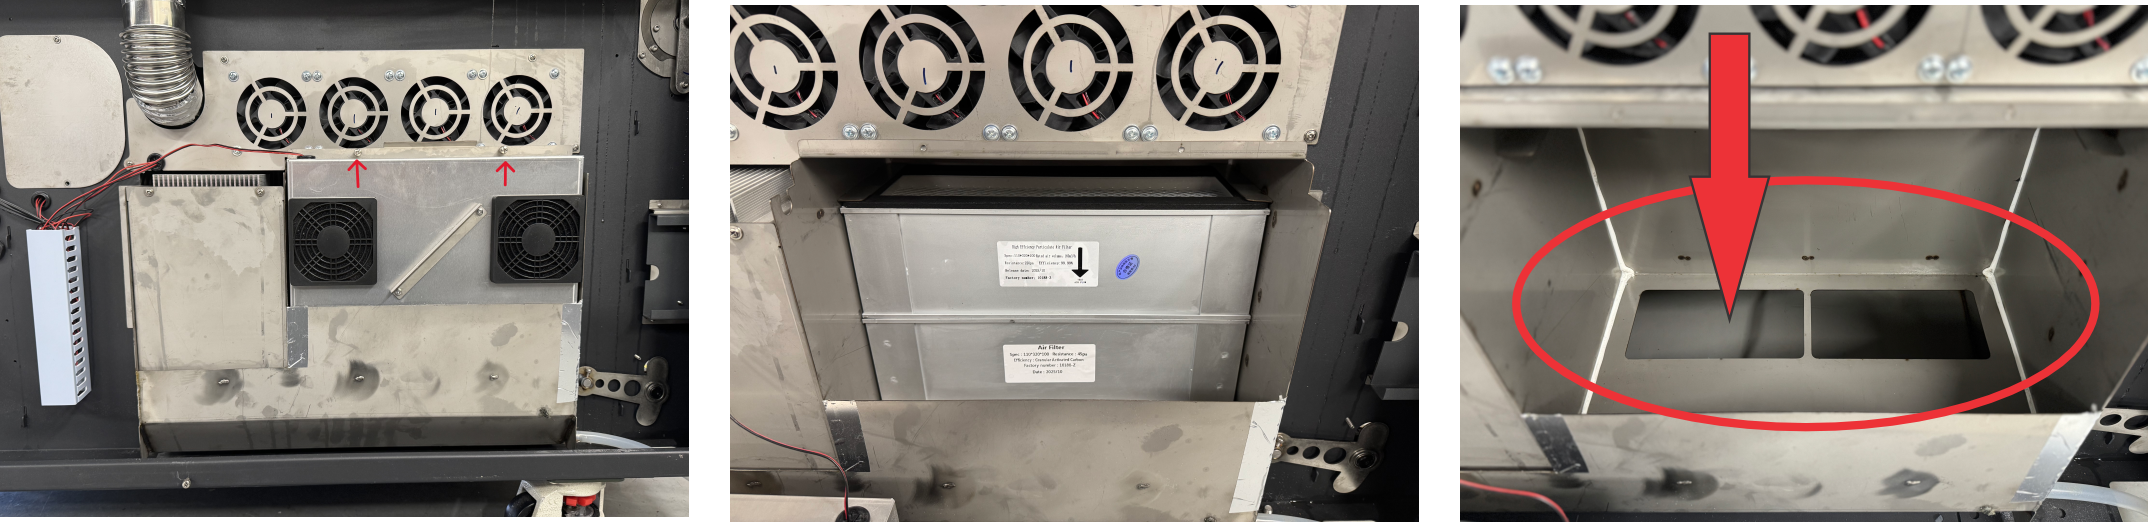
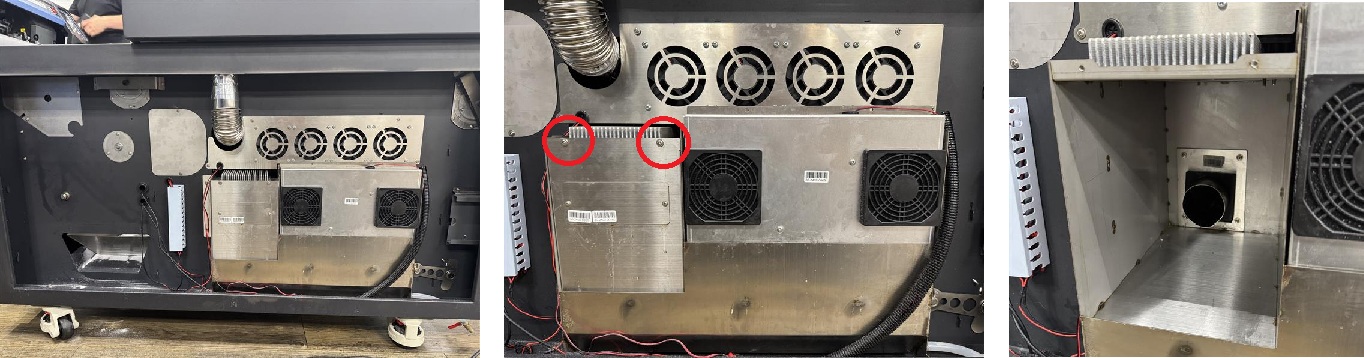
To access the extraction chamber, remove the screws circled below. Then clean the inside of the extraction chamber.
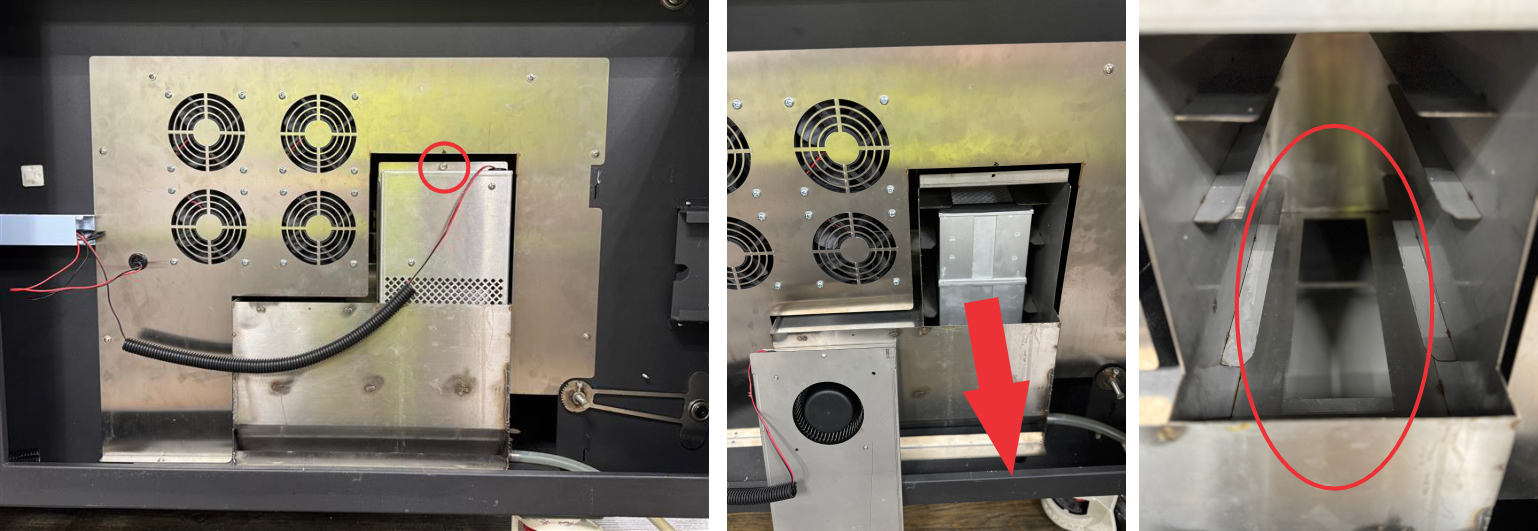
900 Pro - Cleaning under the filters
Glycol will build up in the area under the filters and in the extraction chamber. These areas should be cleaned regularly to prevent the glycol solidifying in these areas.
When cleaning inside the extraction box, wear appropriate PPE and avoid sharp edges.
To access the area under the filters, remove the screws indicated below. Then remove the filters and wipe the gaskets and sides clean.
Then clean the area under the filters as indicated with the red circle.
If you would like any further guidance or have any questions, please see our Troubleshooting Articles or contact your Adkins Dealer
Was this article helpful?
That’s Great!
Thank you for your feedback
Sorry! We couldn't be helpful
Thank you for your feedback
Feedback sent
We appreciate your effort and will try to fix the article