Adkins Inline / Compact / Pro - Film vacuum rollers are noisy or stuck
TABLE OF CONTENTS
1. The gear mechanism is out of alignment
If the feed rollers on your machine spin inconsistently or make a grinding or other loud noise, there may be a problem with the drive mechanism for your vacuum/feed roller.
If you have problems with the film feeding into the machine, but your vacuum roller is turning consistently and quietly, you may find these related articles more helpful:
Adkins Inline / Compact / Pro - Film not feeding in auto mode
Adkins Inline / Compact / Pro - Film slipping on front vacuum roller during initial film loading
1. The gear mechanism is out of alignment
The gearing mechanism fitted to the end of the vacuum roller, on the screen side of the machine, may be out of alignment with the motor. This could cause the roller gear to skip as the motor gear is not making a good enough contact with the roller gear.
Before removing any external cover, unplug the machine from the power source and cycle the power button 10 times.
Inline 800 / 900 pro
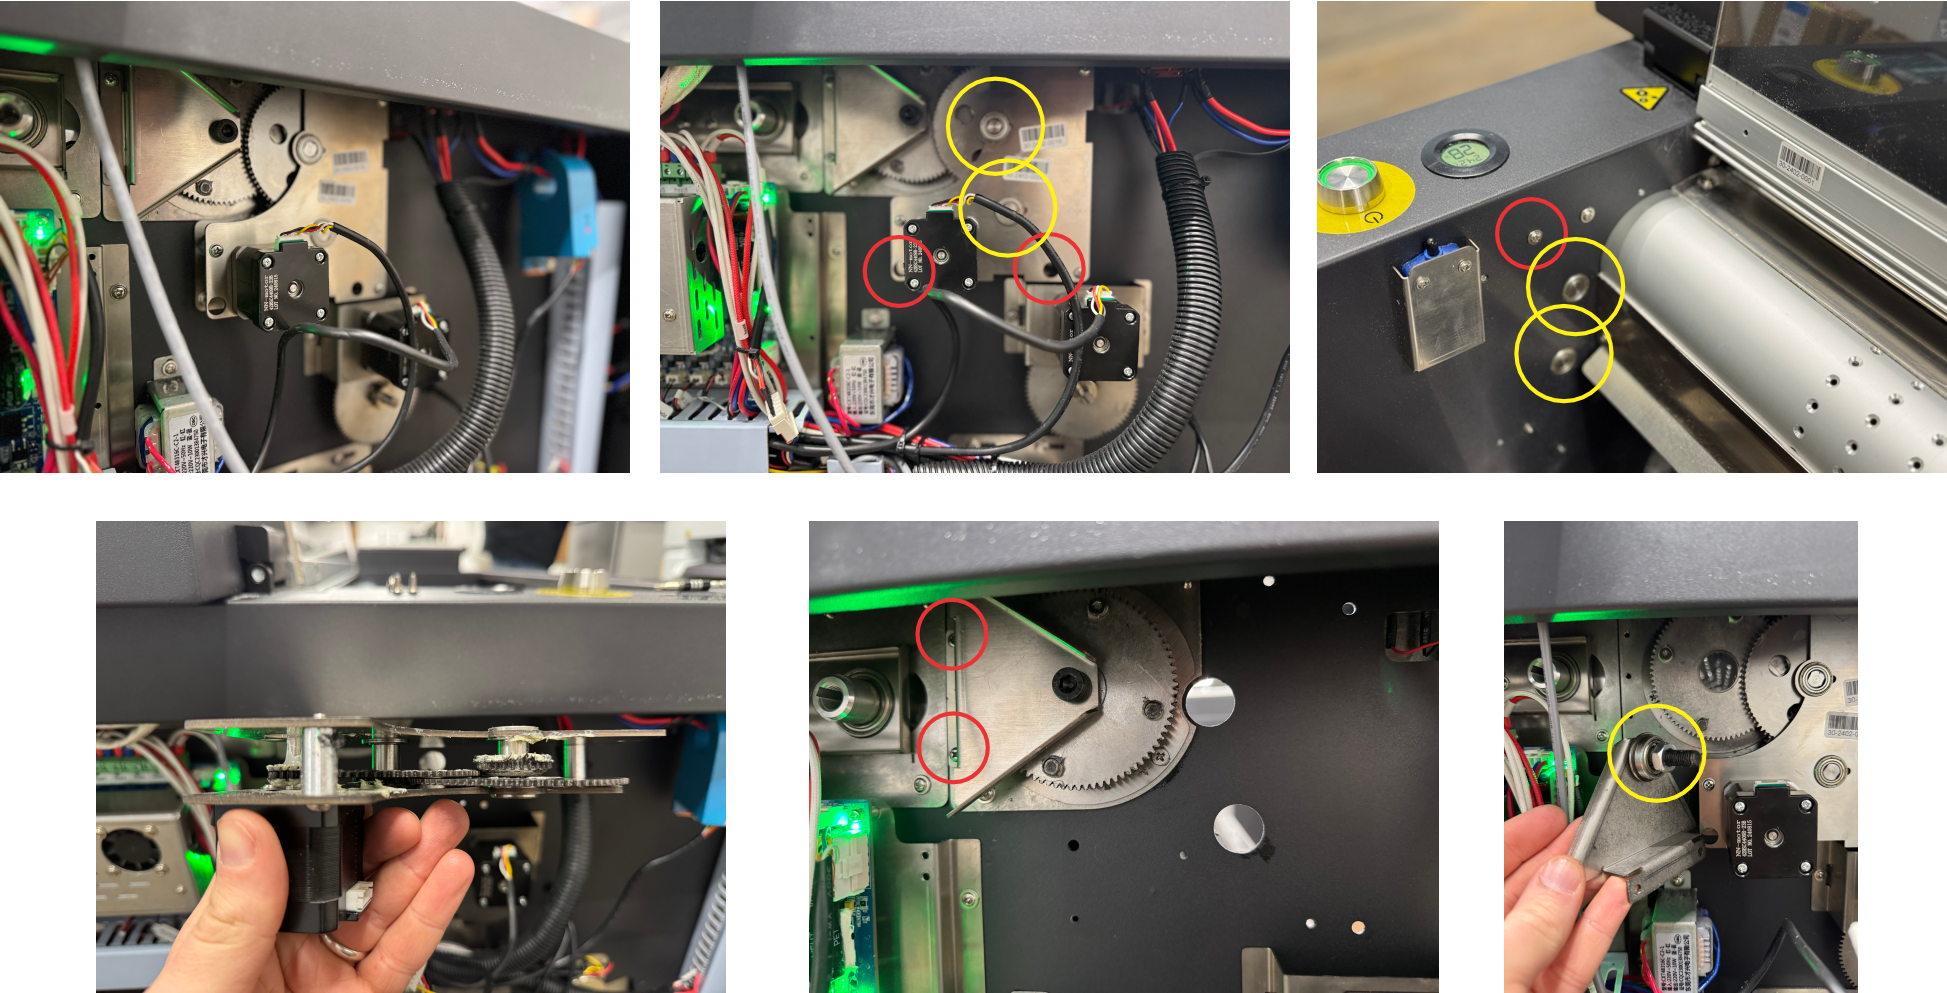
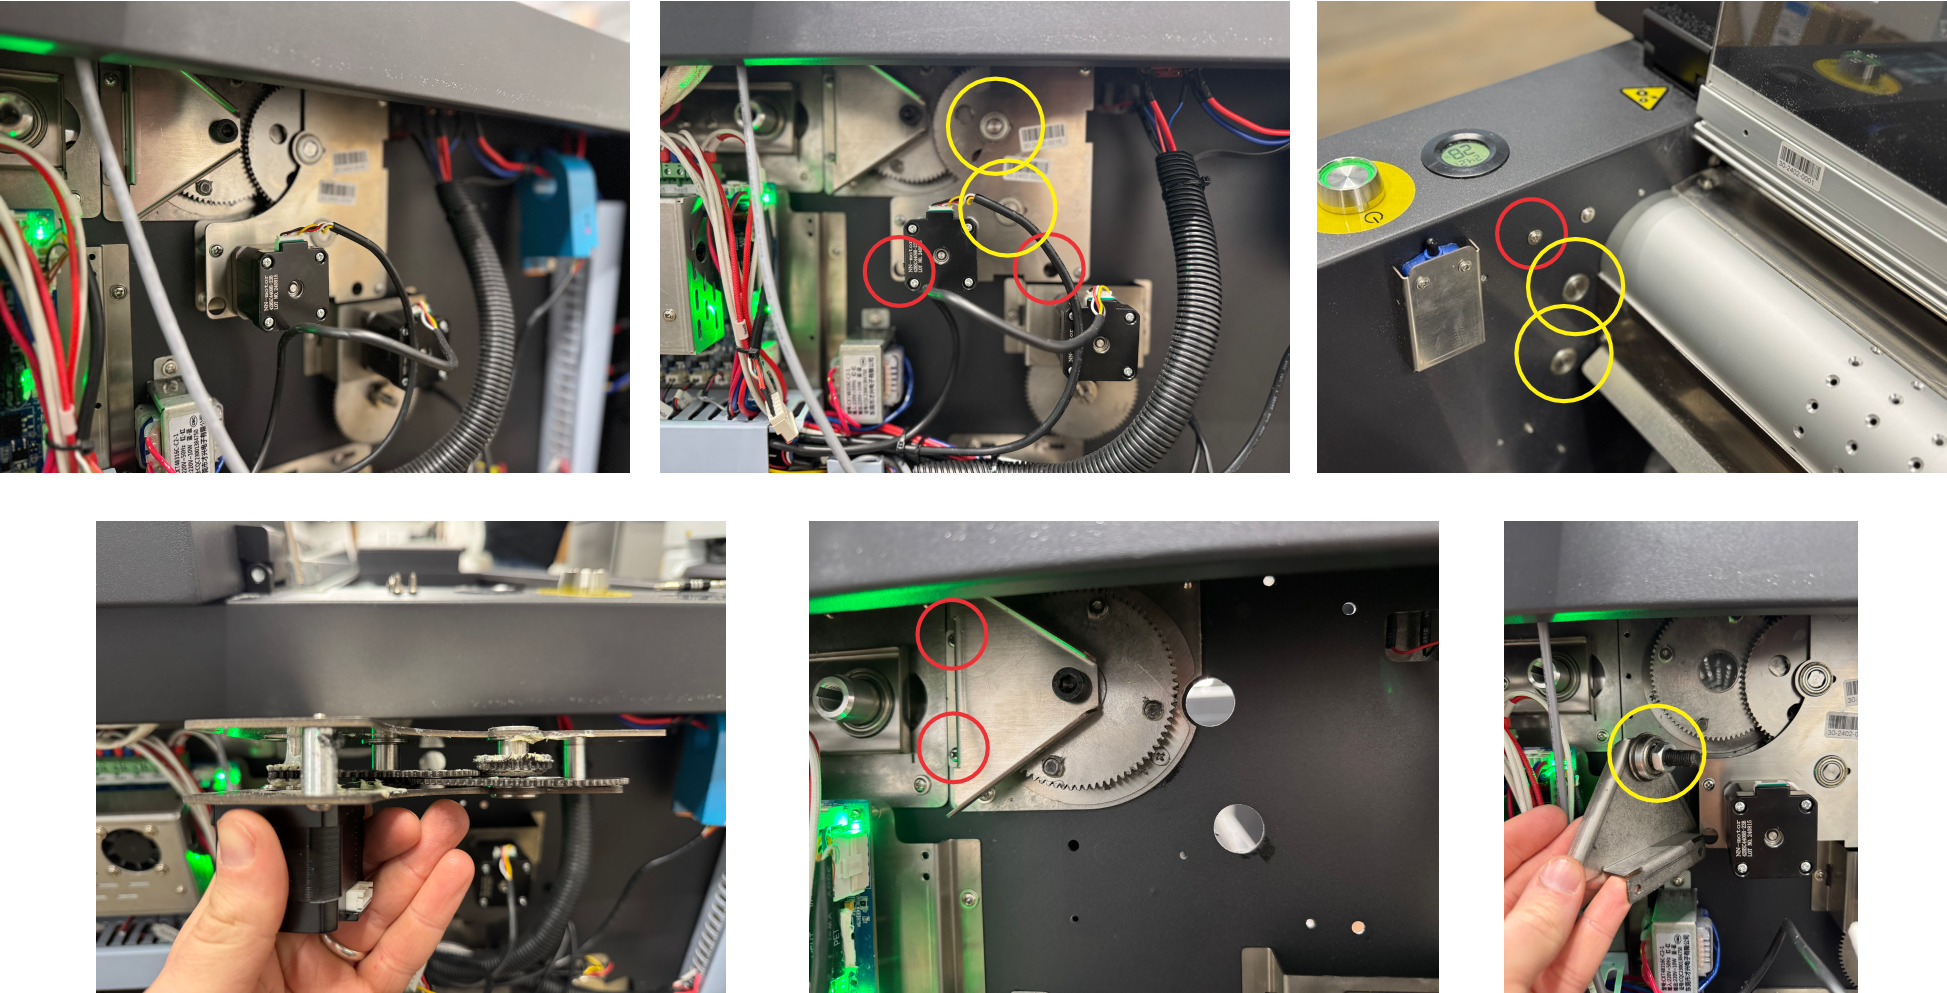
Remove the side cover from the screen side of the machine. Then you can locate the roller motor.

Remove the motor bracket to inspect the gearing inside. You can do this by locating the screws that are shown in the image below.

A small amount of white or silver grease is normal, however if you see any metal shards or filings then you may need to replace a component.
Compact 600 / 900
Remove the side cover from the screen side of the machine. Then you can locate the front vacuum roller motor (or rear on compact models).

Remove the motor bracket and inspect the gear wheel.

A small amount of white or silver grease is normal, however if you see any metal shards or filings then you may need to replace a component.
When refitting the motor gear assembly, align the gearing up with the roller gear and make sure that it is making a good contact before securing the bracket in place.
If you find that you need to replace any components, please contact your Adkins dealer.
2. A bearing may be worn
The gearing mechanism fitted to the end of the vacuum roller, on the screen side of the machine, incorporates 1 or more flanged bearings. Over time these bearings can wear and create friction which prevents the rollers from turning freely. To assess whether the bearings need replacing, you will need to remove them to test them unobstructed.
Before removing any external cover, unplug the machine from the power source and cycle the power button 10 times.
Remove the side cover from the screen side of the machine. Then you can locate the front vacuum roller motor (or rear on compact models).
Inline 800 / 900 pro
Remove the motor bracket to inspect the bearings inside the gearing assembly. You can do this by locating the screws that are shown in the image below.
The bearings (yellow) will be contained however the gearing should turn freely enough to feel if they need replacing. You will feel some resistance from the motor at this point, however if a bearing has failed it is unlikely that you will be able to turn any gears at all.
You should also inspect the roller bearing by removing the bracket shown above. The bearing should turn freely and smoothly.
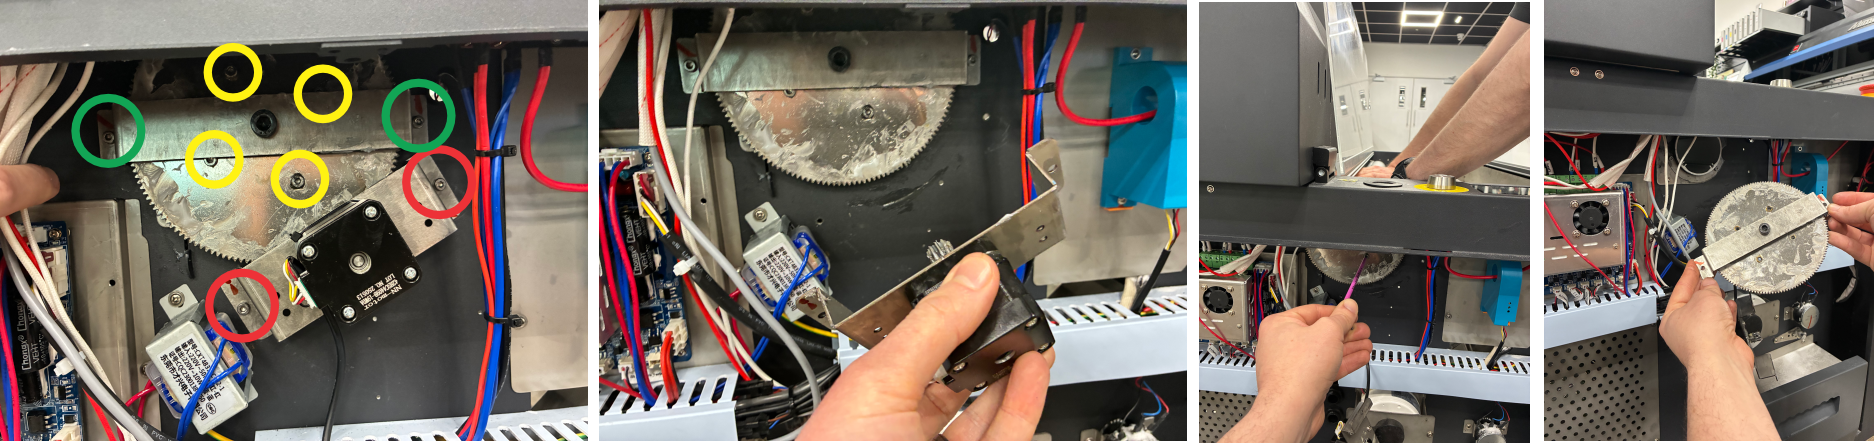
Compact 600 / 900
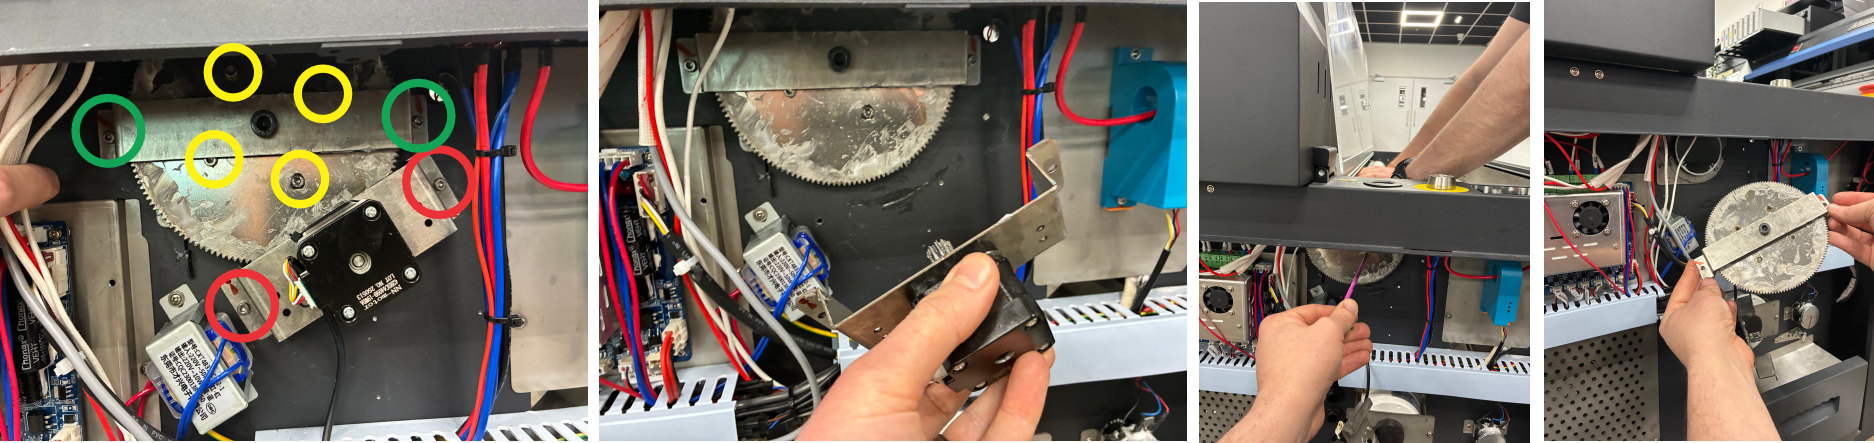
Remove the motor bracket (red) and move this out of the way. Remove the 4x 3mm Allen key bolts (yellow) holding the gear to the roller. You may need one person to hold the roller still while one person removes the 4x bolts. Once removed, you can remove the bearing bracket from the machine (green). The gear and bracket should come off as one piece. You can now inspect the roller bearing. It should spin freely and smoothly.
When refitting the motor gear assembly, align the gearing up with the roller gear and make sure that it is making a good contact before securing the bracket in place.
If you find that you need to replace any components, please contact your Adkins dealer.
3. The rubber gasket ring may have worked loose.
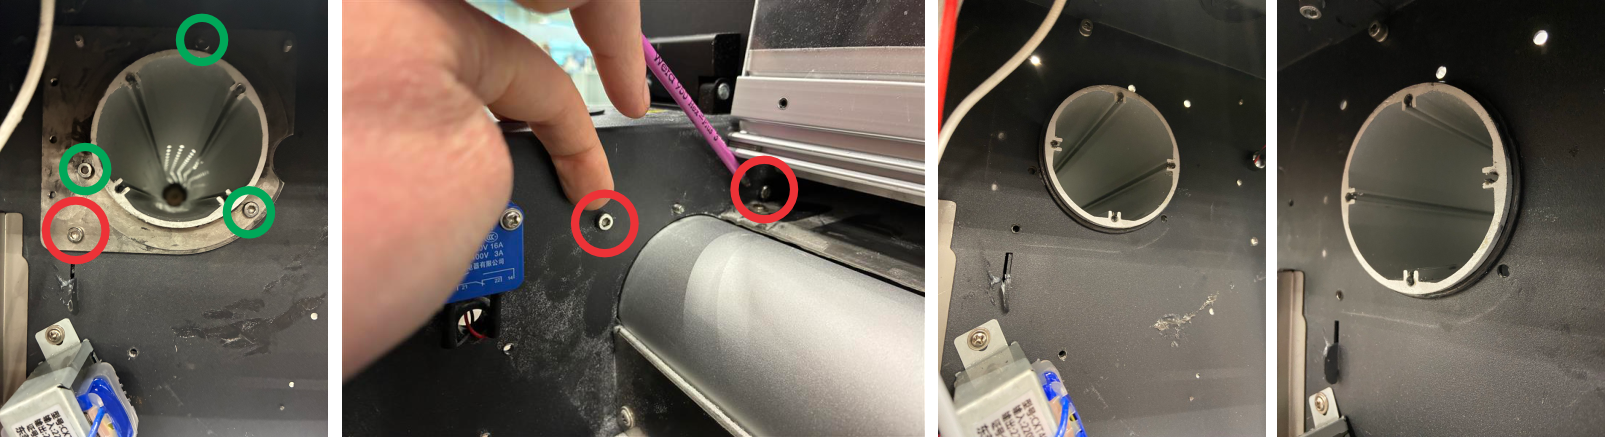
Around each end of the roller there is a rubber O-ring gasket that helps to prevent powder ingress and contain the vacuum strength within the roller. This can come loose and prevent the roller from turning freely at certain points.
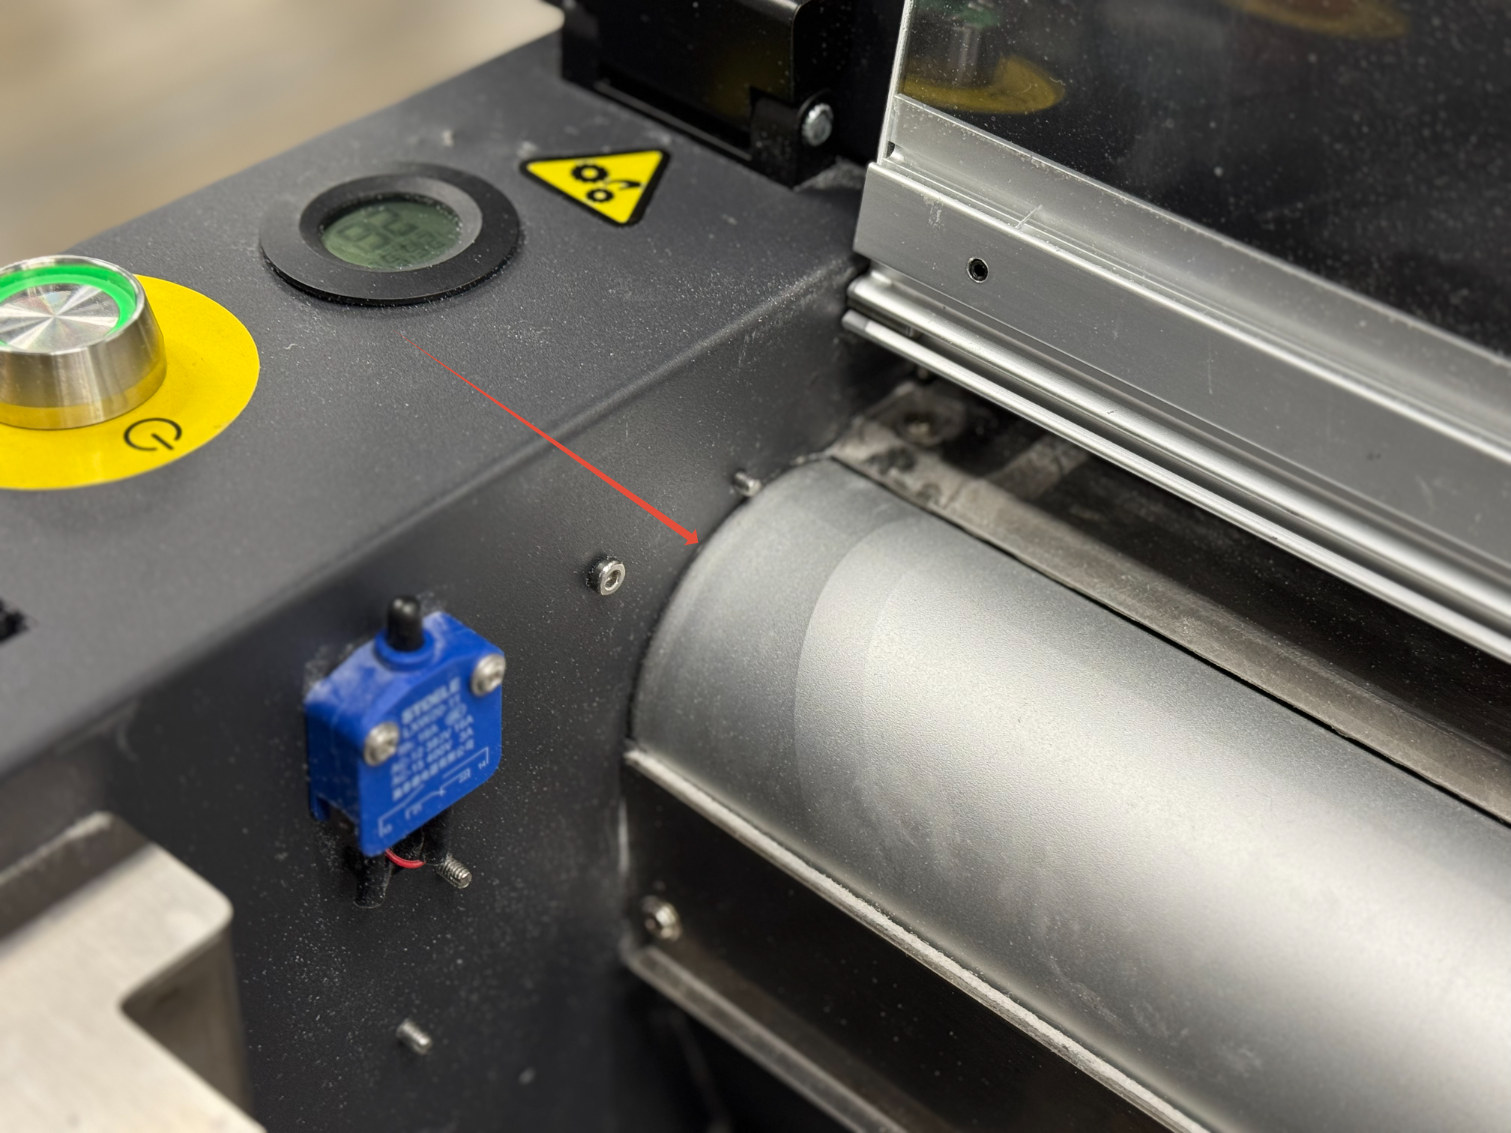
The easiest way to tell if your gasket has come loose is to inspect the end of the roller from under the powder cover. As shown below, pay close attention to the area where the machine chassis and roller meets. If you can see part of a rubber O-ring gasket, it is likely that the gasket has become loose.
If you find that you can see the rubber gasket coming past the roller, you will need to re-seat it from the inside.
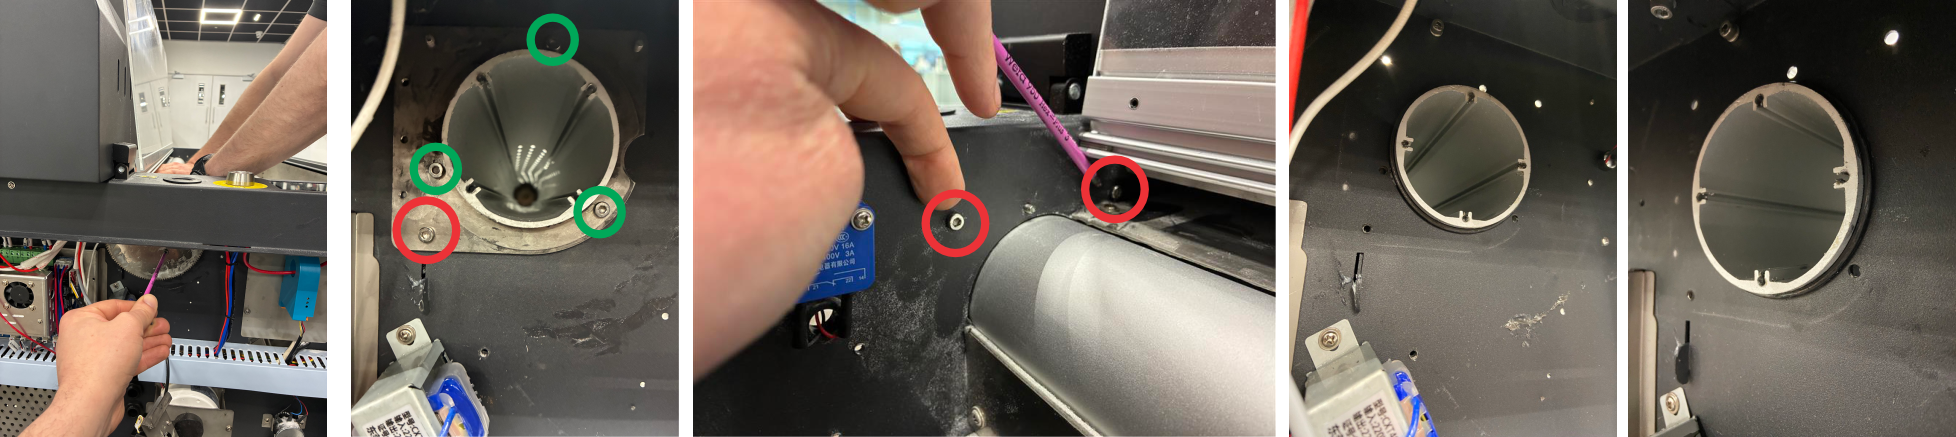
Before removing any external cover, unplug the machine from the power source and cycle the power button 10 times.
Inline 800 / 900 Pro
Remove the motor bracket and gearing assembly. You can do this by locating the screws that are shown in the image below.
You can then remove the gear from the roller. You may need one person to hold the roller still while one person removes the 4x bolts.
You can now remove the gasket housing by removing the 3x 3mm Allen key bolts (green) holding the gasket cover and the 3x 3mm Allen key bolts (red) holding the gasket surround. This should leave the gasket accessible to be re-seated.
Compact 600 / 900
Remove the motor bracket (red) and move this out of the way. Remove the 4x 3mm Allen key bolts (yellow) holding the gear to the roller. You may need one person to hold the roller still while one person removes the 4x bolts. Once removed, you can remove the bearing bracket from the machine (green). The gear and bracket should come off as one piece.
You can now remove the gasket housing by removing the 3x 3mm Allen key bolts (green) holding the gasket cover and the 3x 3mm Allen key bolts (red) holding the gasket surround. This should leave the gasket accessible to be re-seated.
When refitting the motor gear assembly, align the gearing up with the roller gear and make sure that it is making a good contact before securing the bracket in place.
If you find that you need to replace any components or if the above has not resolved your problem, please contact your Adkins Dealer.
Was this article helpful?
That’s Great!
Thank you for your feedback
Sorry! We couldn't be helpful
Thank you for your feedback
Feedback sent
We appreciate your effort and will try to fix the article